Symbols
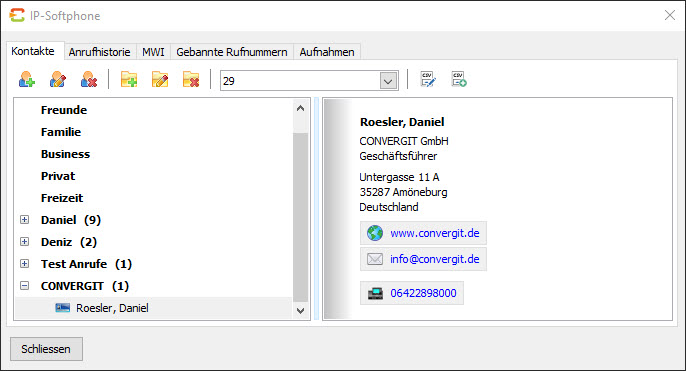
 Add contact. Adds a contact to the selected group.
 Edit contact. Opens the highlighted contact, you can now edit it. A double click with the mouse also performs the same task.
 Delete contact. Removes the highlighted contact.
 Add new group. A new group is added. Groups are always appended below.
 Edit group. The marked group can be edited / renamed.
 Delete group. The entire group will be deleted. ATTENTION all contained contacts will also be deleted.
 Select the desired SIP proxy via which the stored contacts should be called .
 Export CSV. The selected contact is exported as a CSV file.
 Import CSV. You can import contacts as CSV files.
CSV manager
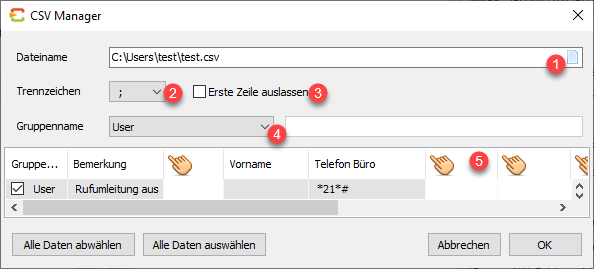
| number | function |
|---|---|
| 1 | filename Path to the file to be imported |
| 2 | delimiter Specification of the separator that separates the individual values in the import file. |
| 3 | Skip first line The first line usually only contains the column designation and should generally not be imported. |
| 4 | group name Specification of the group into which the data is to be imported. |
| 5 | column header Assignment of the data column of the import file to a contact value . |
The “OK” button for the import process is only released after the columns have been assigned.
Presence in contacts
In order for the presence function to be used, the contact must be created and prepared.
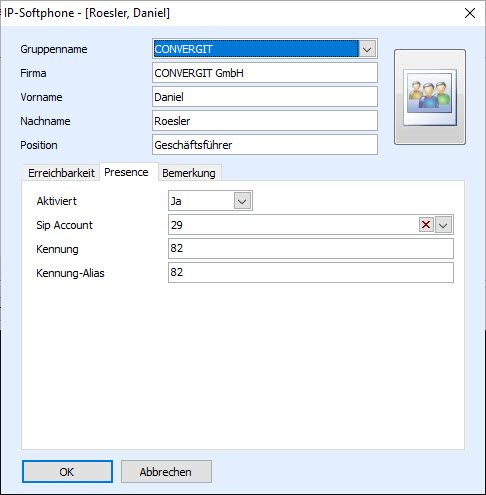

As a first step, Presence must be activated for the contact. To do this, select “Yes”.

In the next step, select your proxy for which Presence should be activated from . In our example the 29.

Under ID, enter the login name with which the monitoring account logs on to the telephone system .

You can freely choose the identifier alias . In our example we use the identifier .
You can call up the presence list / speed dial using the [F9] key on your keyboard .